Building workflows
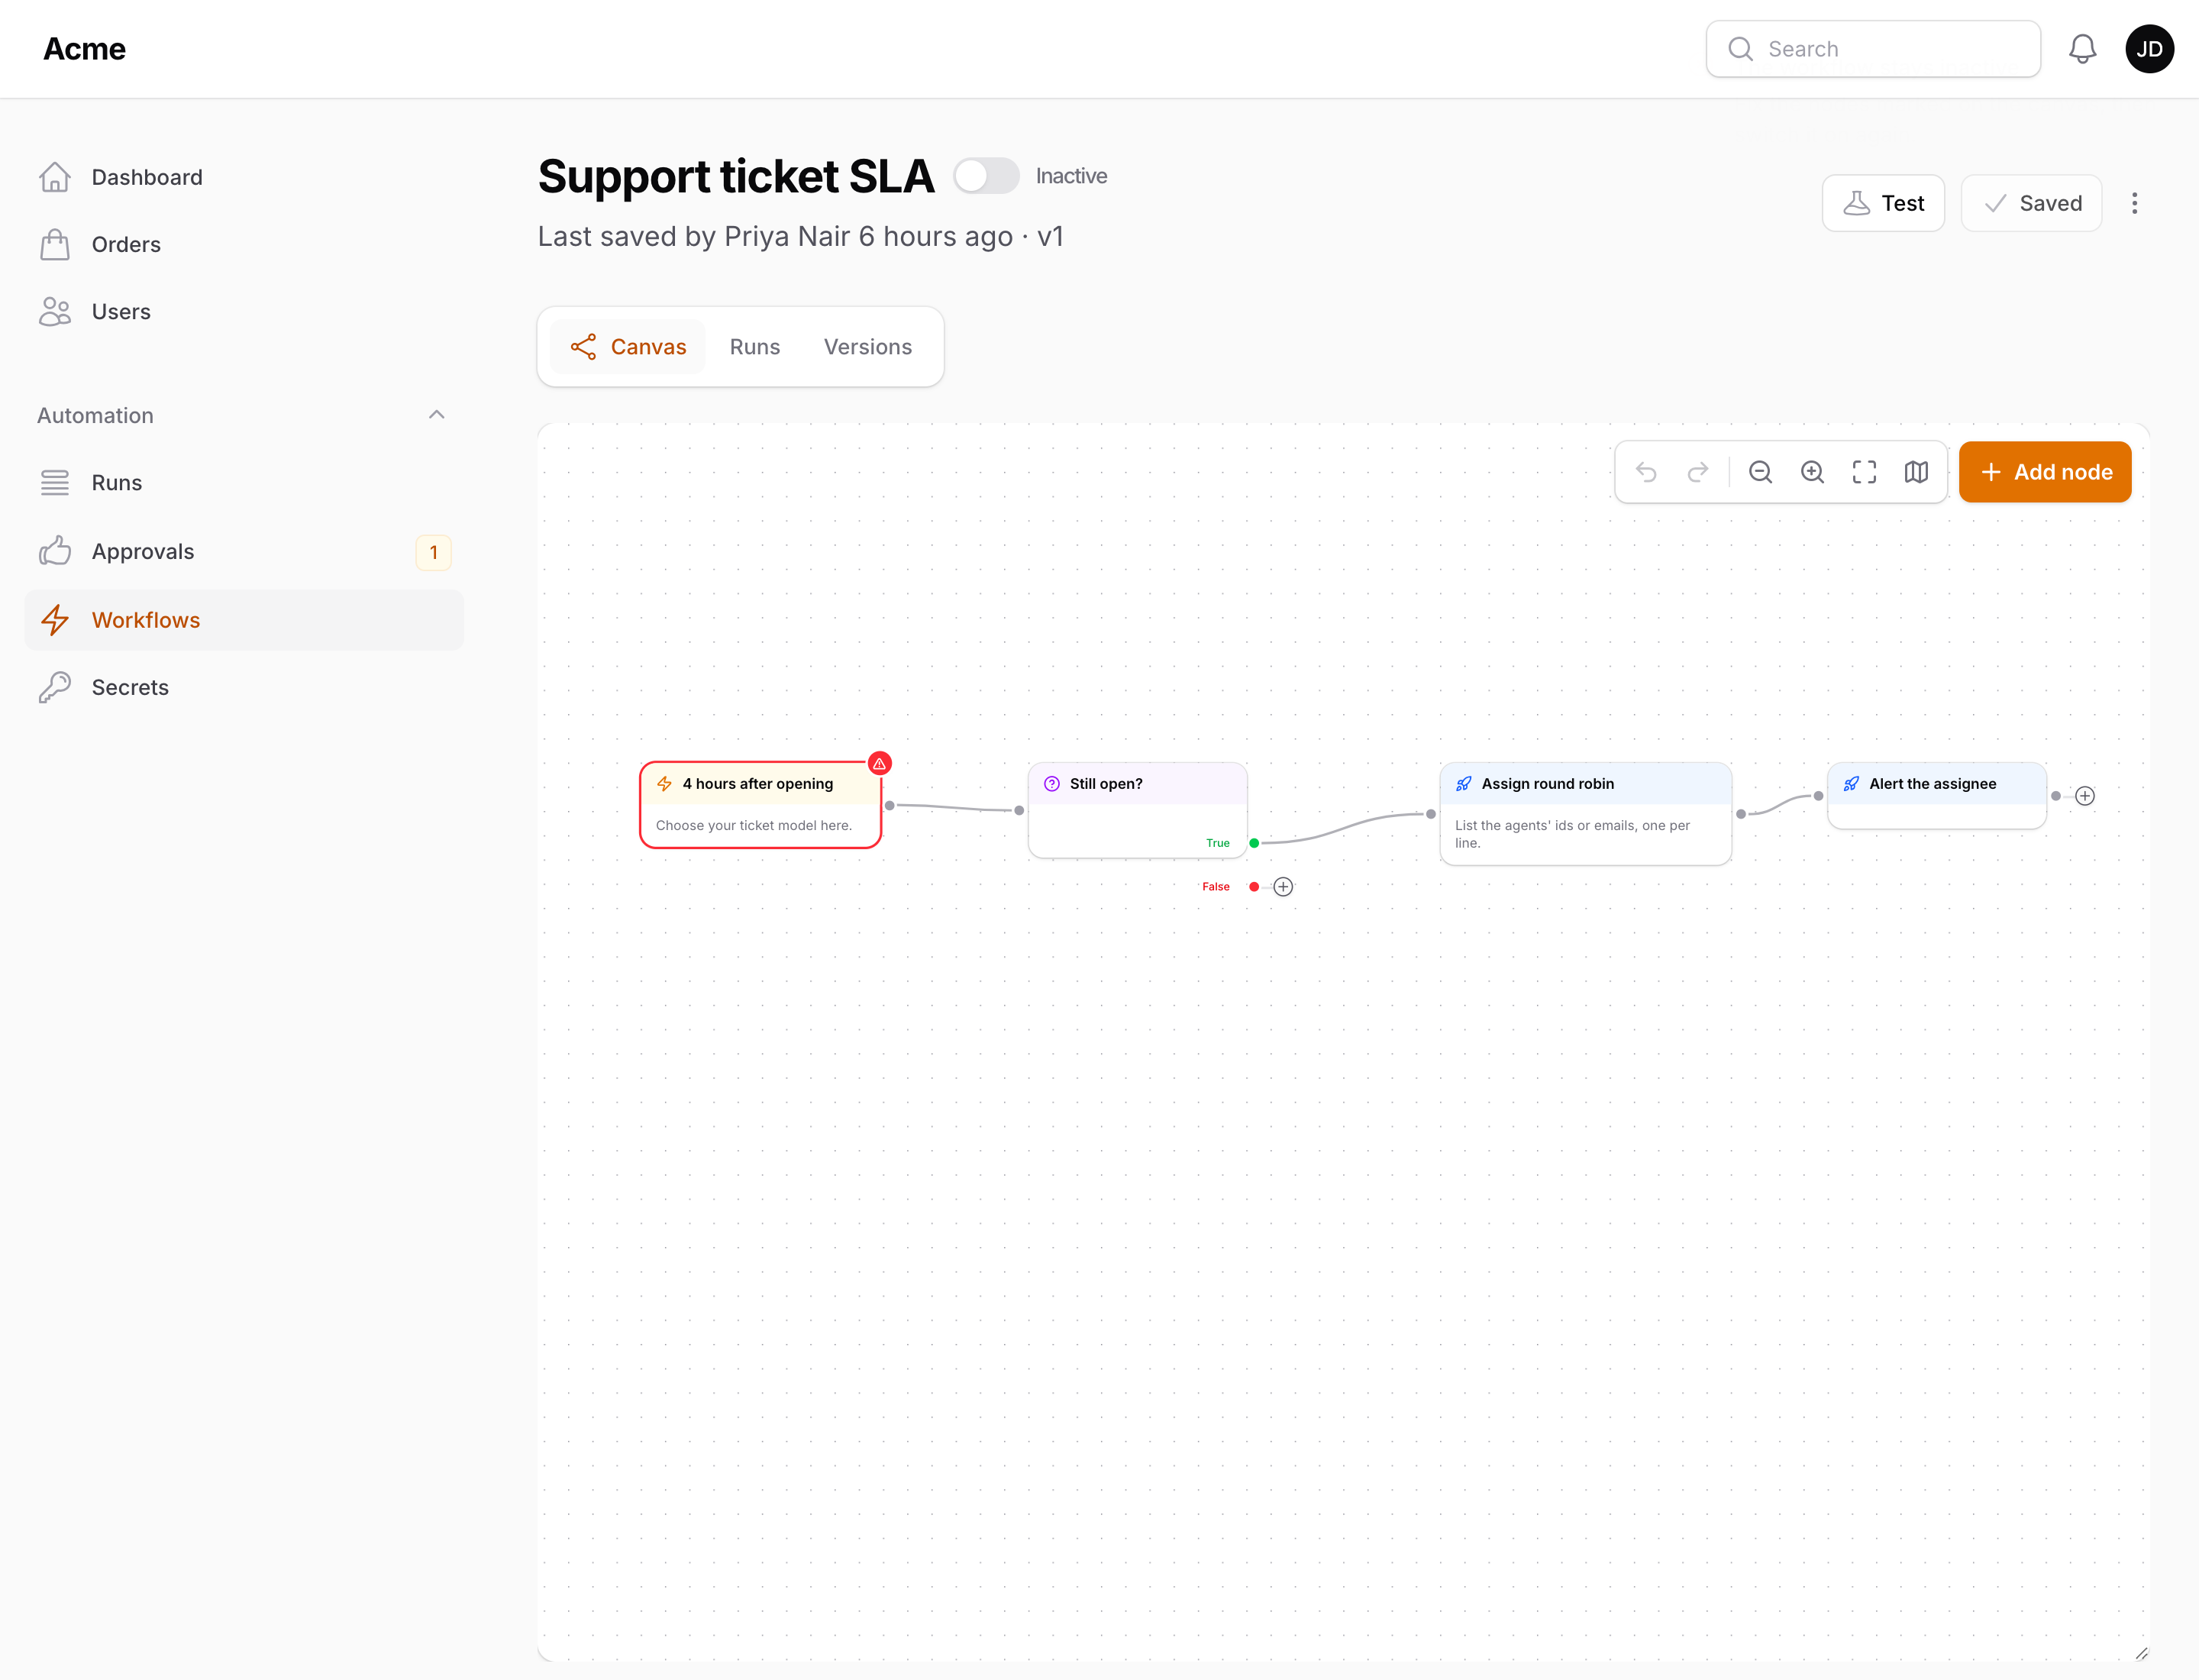
A workflow is a graph drawn on a canvas: trigger nodes start a run, action nodes do something, condition nodes branch on a true / false check. Edges connect an output handle to an input handle. The canvas is the workflow's edit page: it fills the page, with the name as the heading, the Active switch beside it, and Canvas, Runs and Versions as tabs above it. The header holds Test, Run now and Save changes, with Settings, Export and Delete in the more-actions menu.
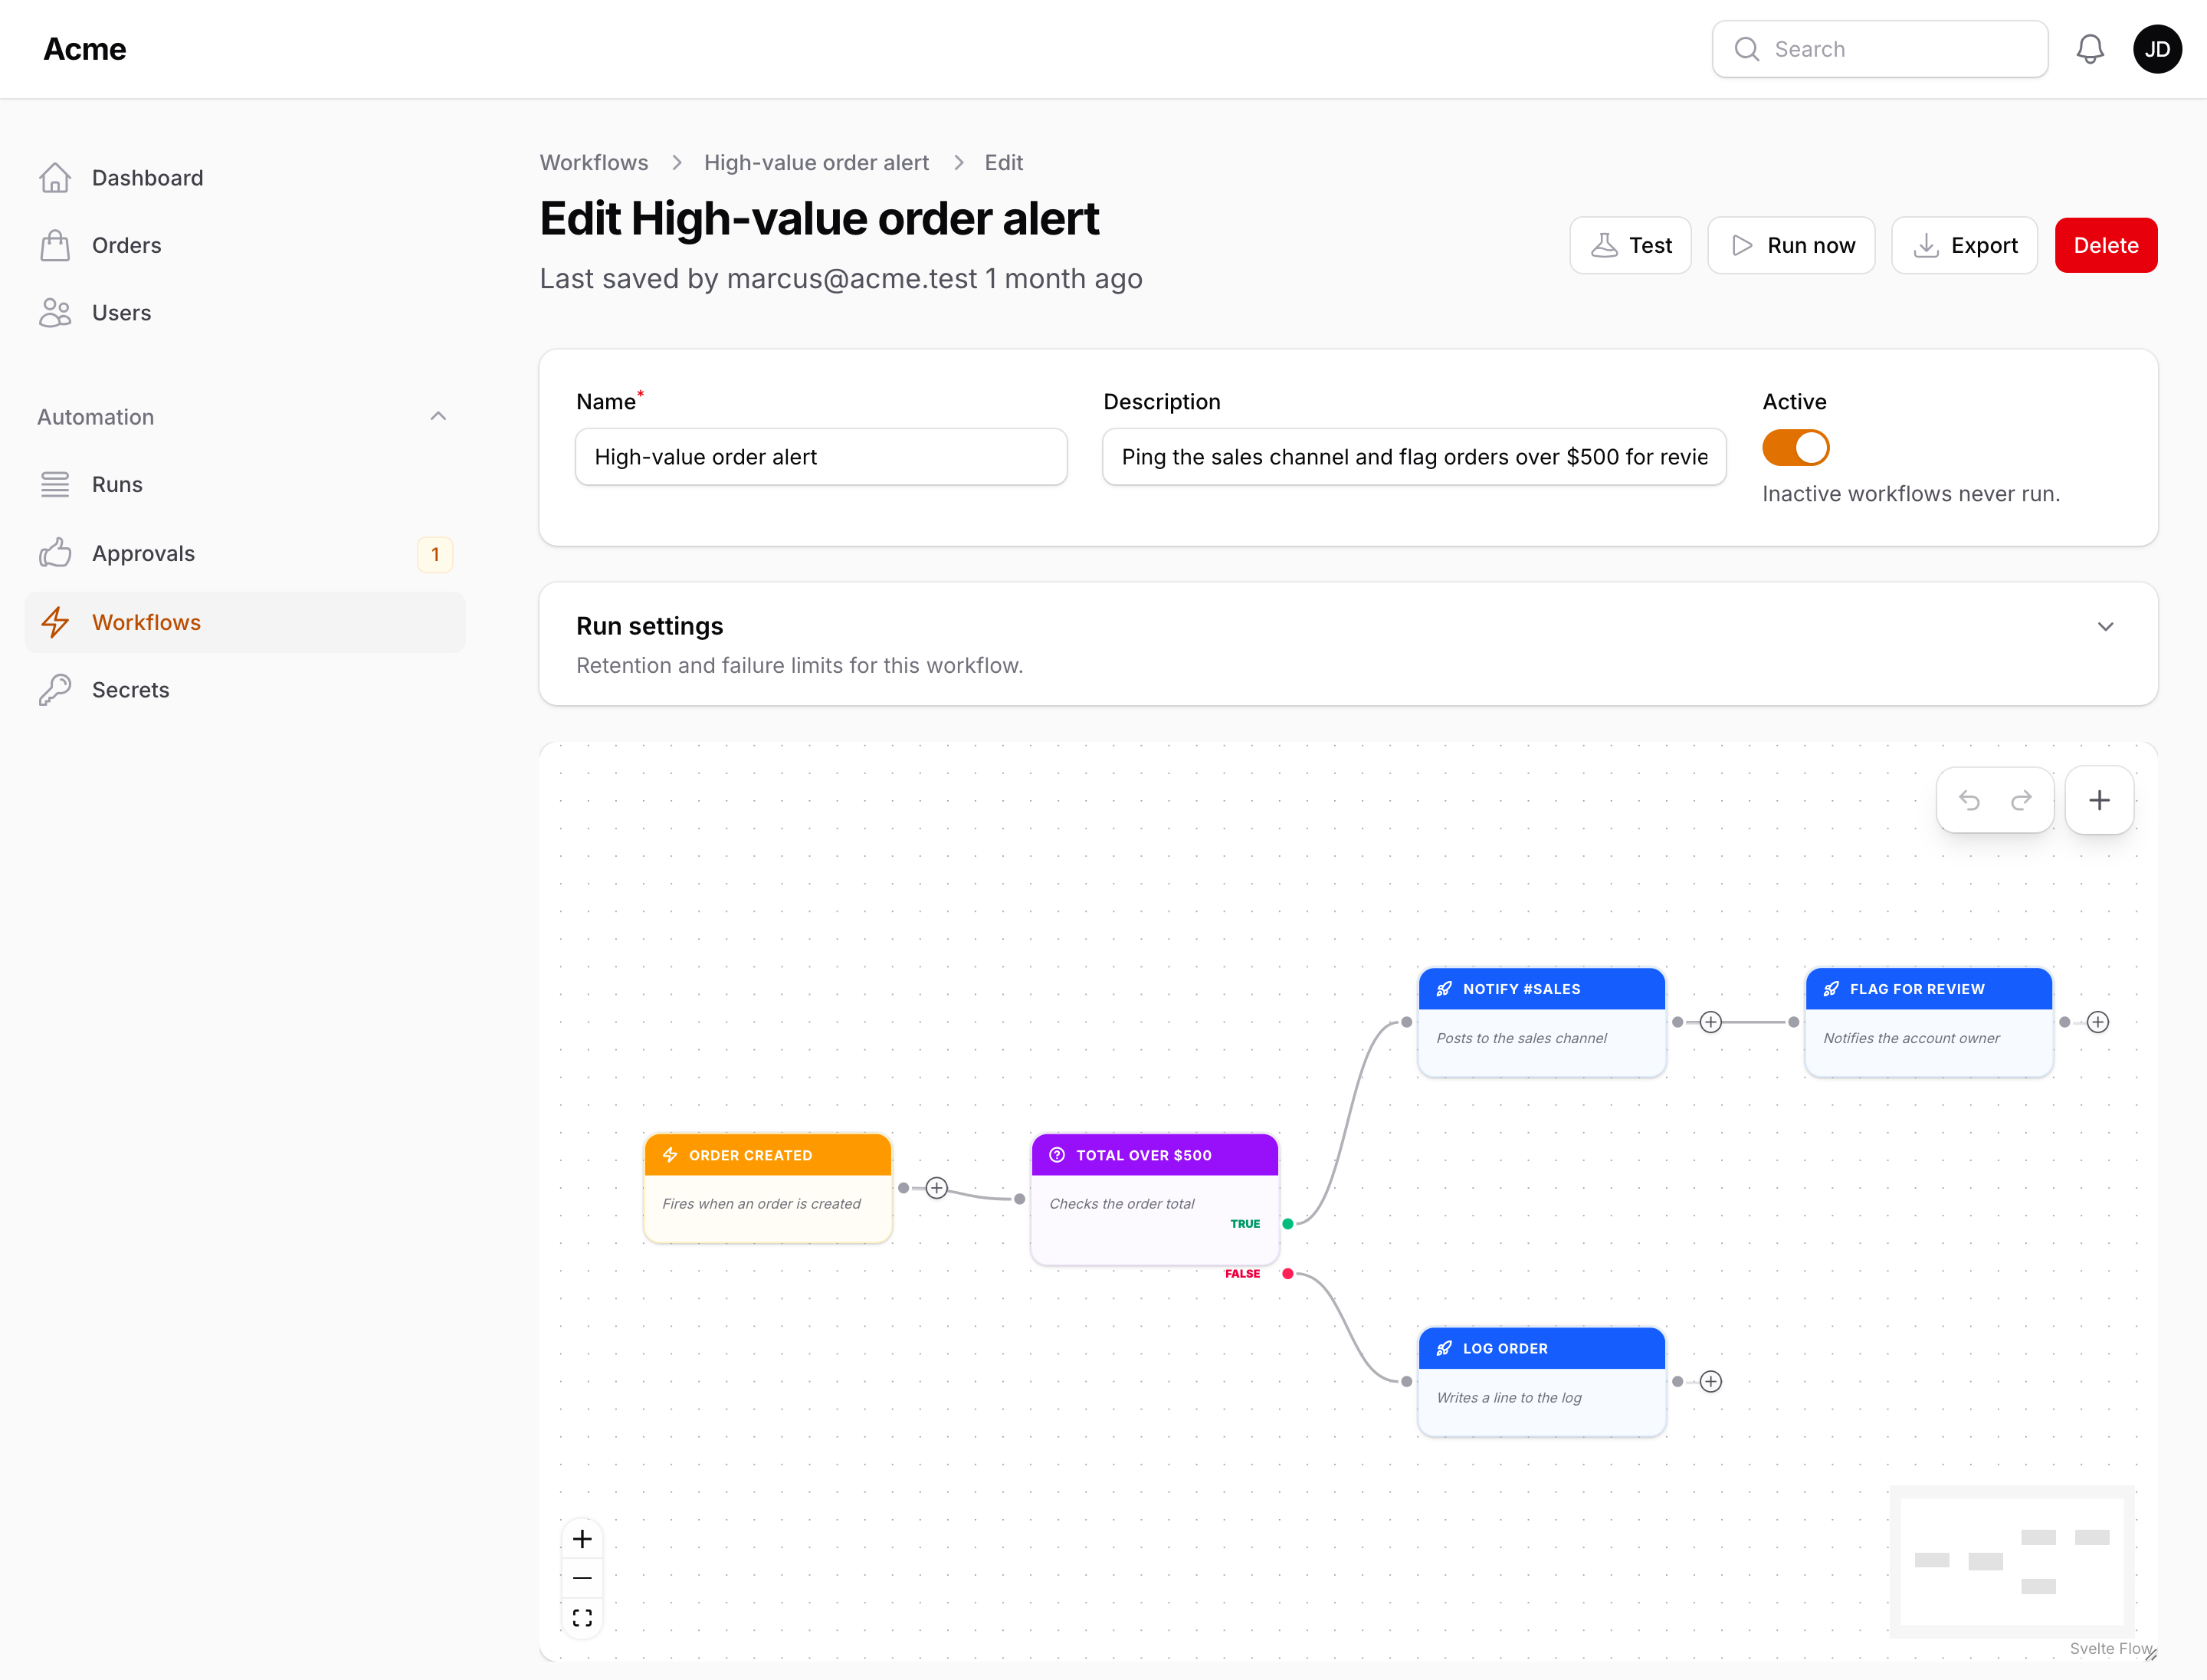
Adding nodes
An empty canvas shows a Start with a trigger card; Add a trigger opens the sidebar on the triggers list. Afterwards there are three ways to add a node:
- the Add node button in the top-right corner of the canvas;
- right-click on an empty spot of the canvas and choose Add node — the node is placed where you clicked;
- the plus next to an unconnected output handle — the new node is placed beside it and connected to that handle in one go.
The sidebar lists Triggers, Actions and Conditions — plus AI once Agents for Laravel is installed, and any group your own nodes declare; open a category or type in the search box to filter every node by name. Click a node to place it, or drag it onto the canvas to drop it exactly where you want. A node added through the Add node button lands in the centre of the visible area, nudged aside if something is already there.
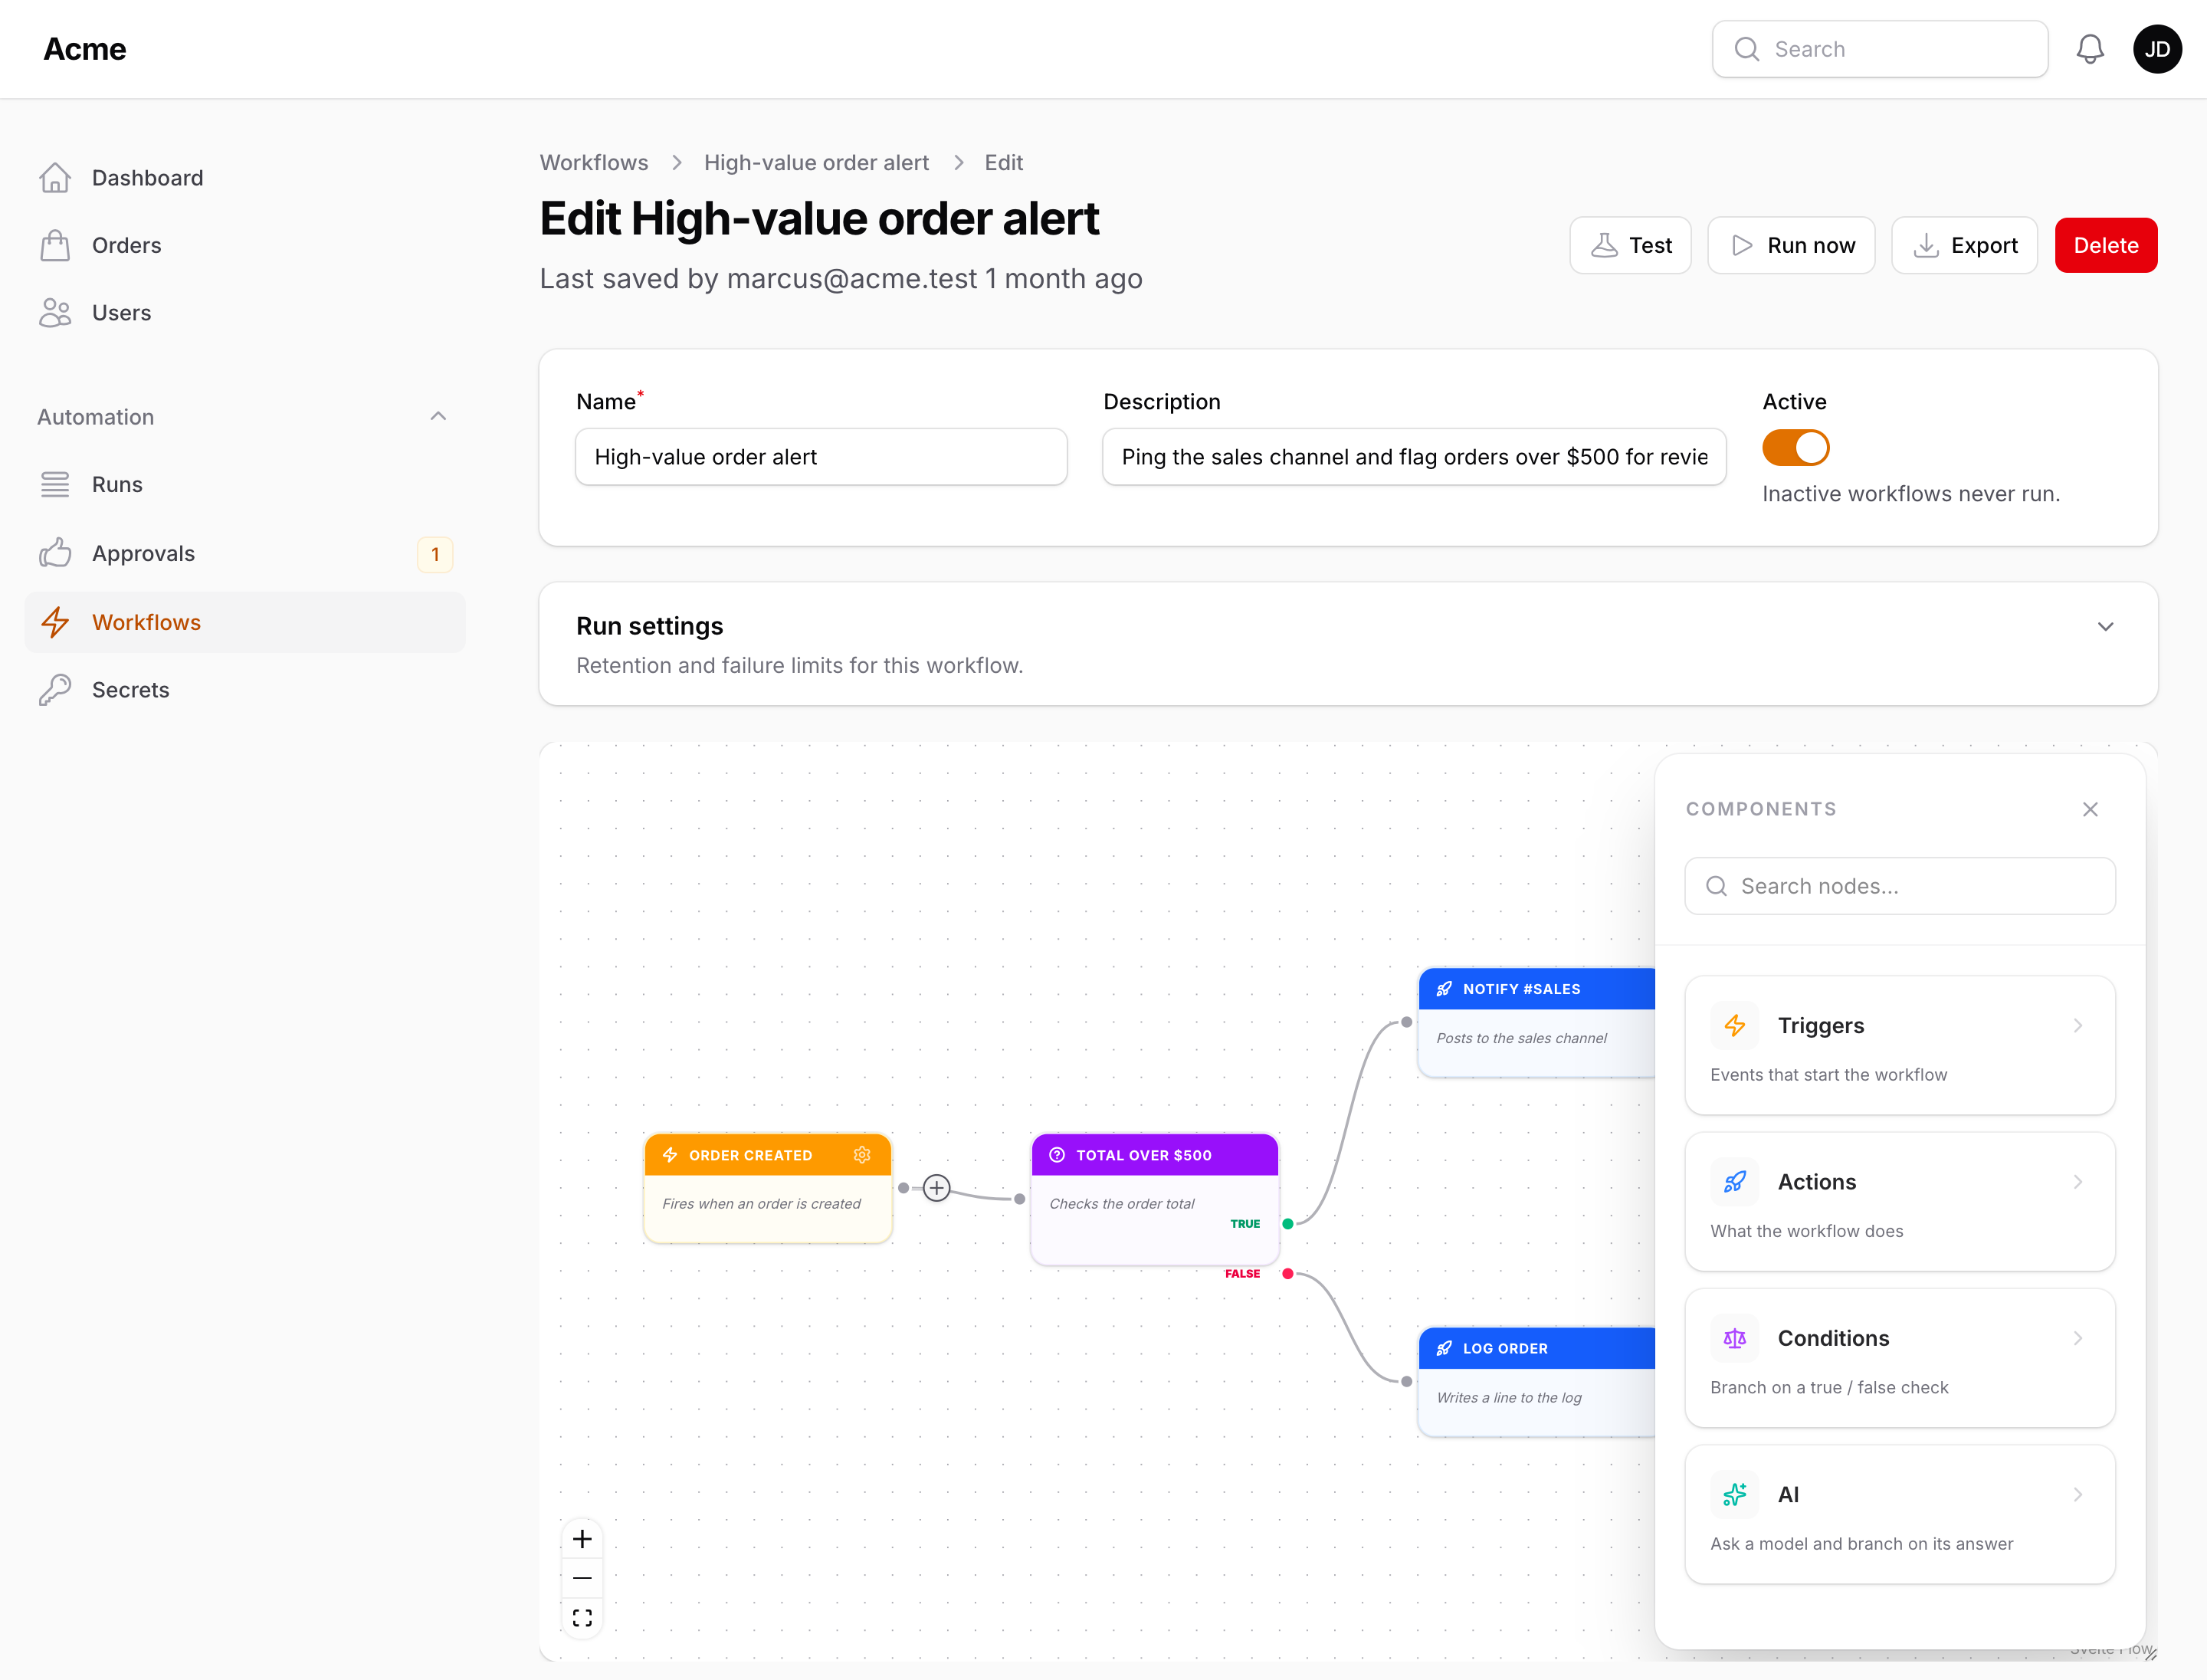
Connecting nodes
Drag from a node's output handle (on its right) to another node's input handle (on its left). Triggers have one output and no input; most actions have one input and one output; conditions have one input and two outputs, True (green) and False (red). Some actions have several named outputs — For each (Each item / Done), Ask for approval (Approved / Rejected / Timed out), Wait for signal (Received / Timed out), and Decide, whose outputs come from its settings (Yes / No, one per option or level, Not sure; see Decisions with Jev) — and an action whose error handling is set to Follow the error branch shows a red Error output.
- Every node connected to the same output runs, in the order the edges were drawn, one branch after the other.
- A condition follows only the edges leaving the output that matches its result. Leave an output unconnected when nothing should happen on that branch.
- A node cannot lead back to itself along the same path: the canvas refuses a connection that would close a loop (the handle does not snap), and the runner stops such a run with a "Cycle detected" error should one reach it from code. The canvas also refuses an edge into a trigger, a node connected to itself, and a second edge between the same two handles. A node reachable through two different branches runs once per branch.
Select an edge or a node and press Backspace or Delete to remove it; deleting a node also removes its edges.
Node settings
Every node has a label (shown in the node header and in the run log), an optional description, and the settings specific to its type. Open the slide-over with the gear icon in the node header, by double-clicking the node, or from the right-click menu's Settings.
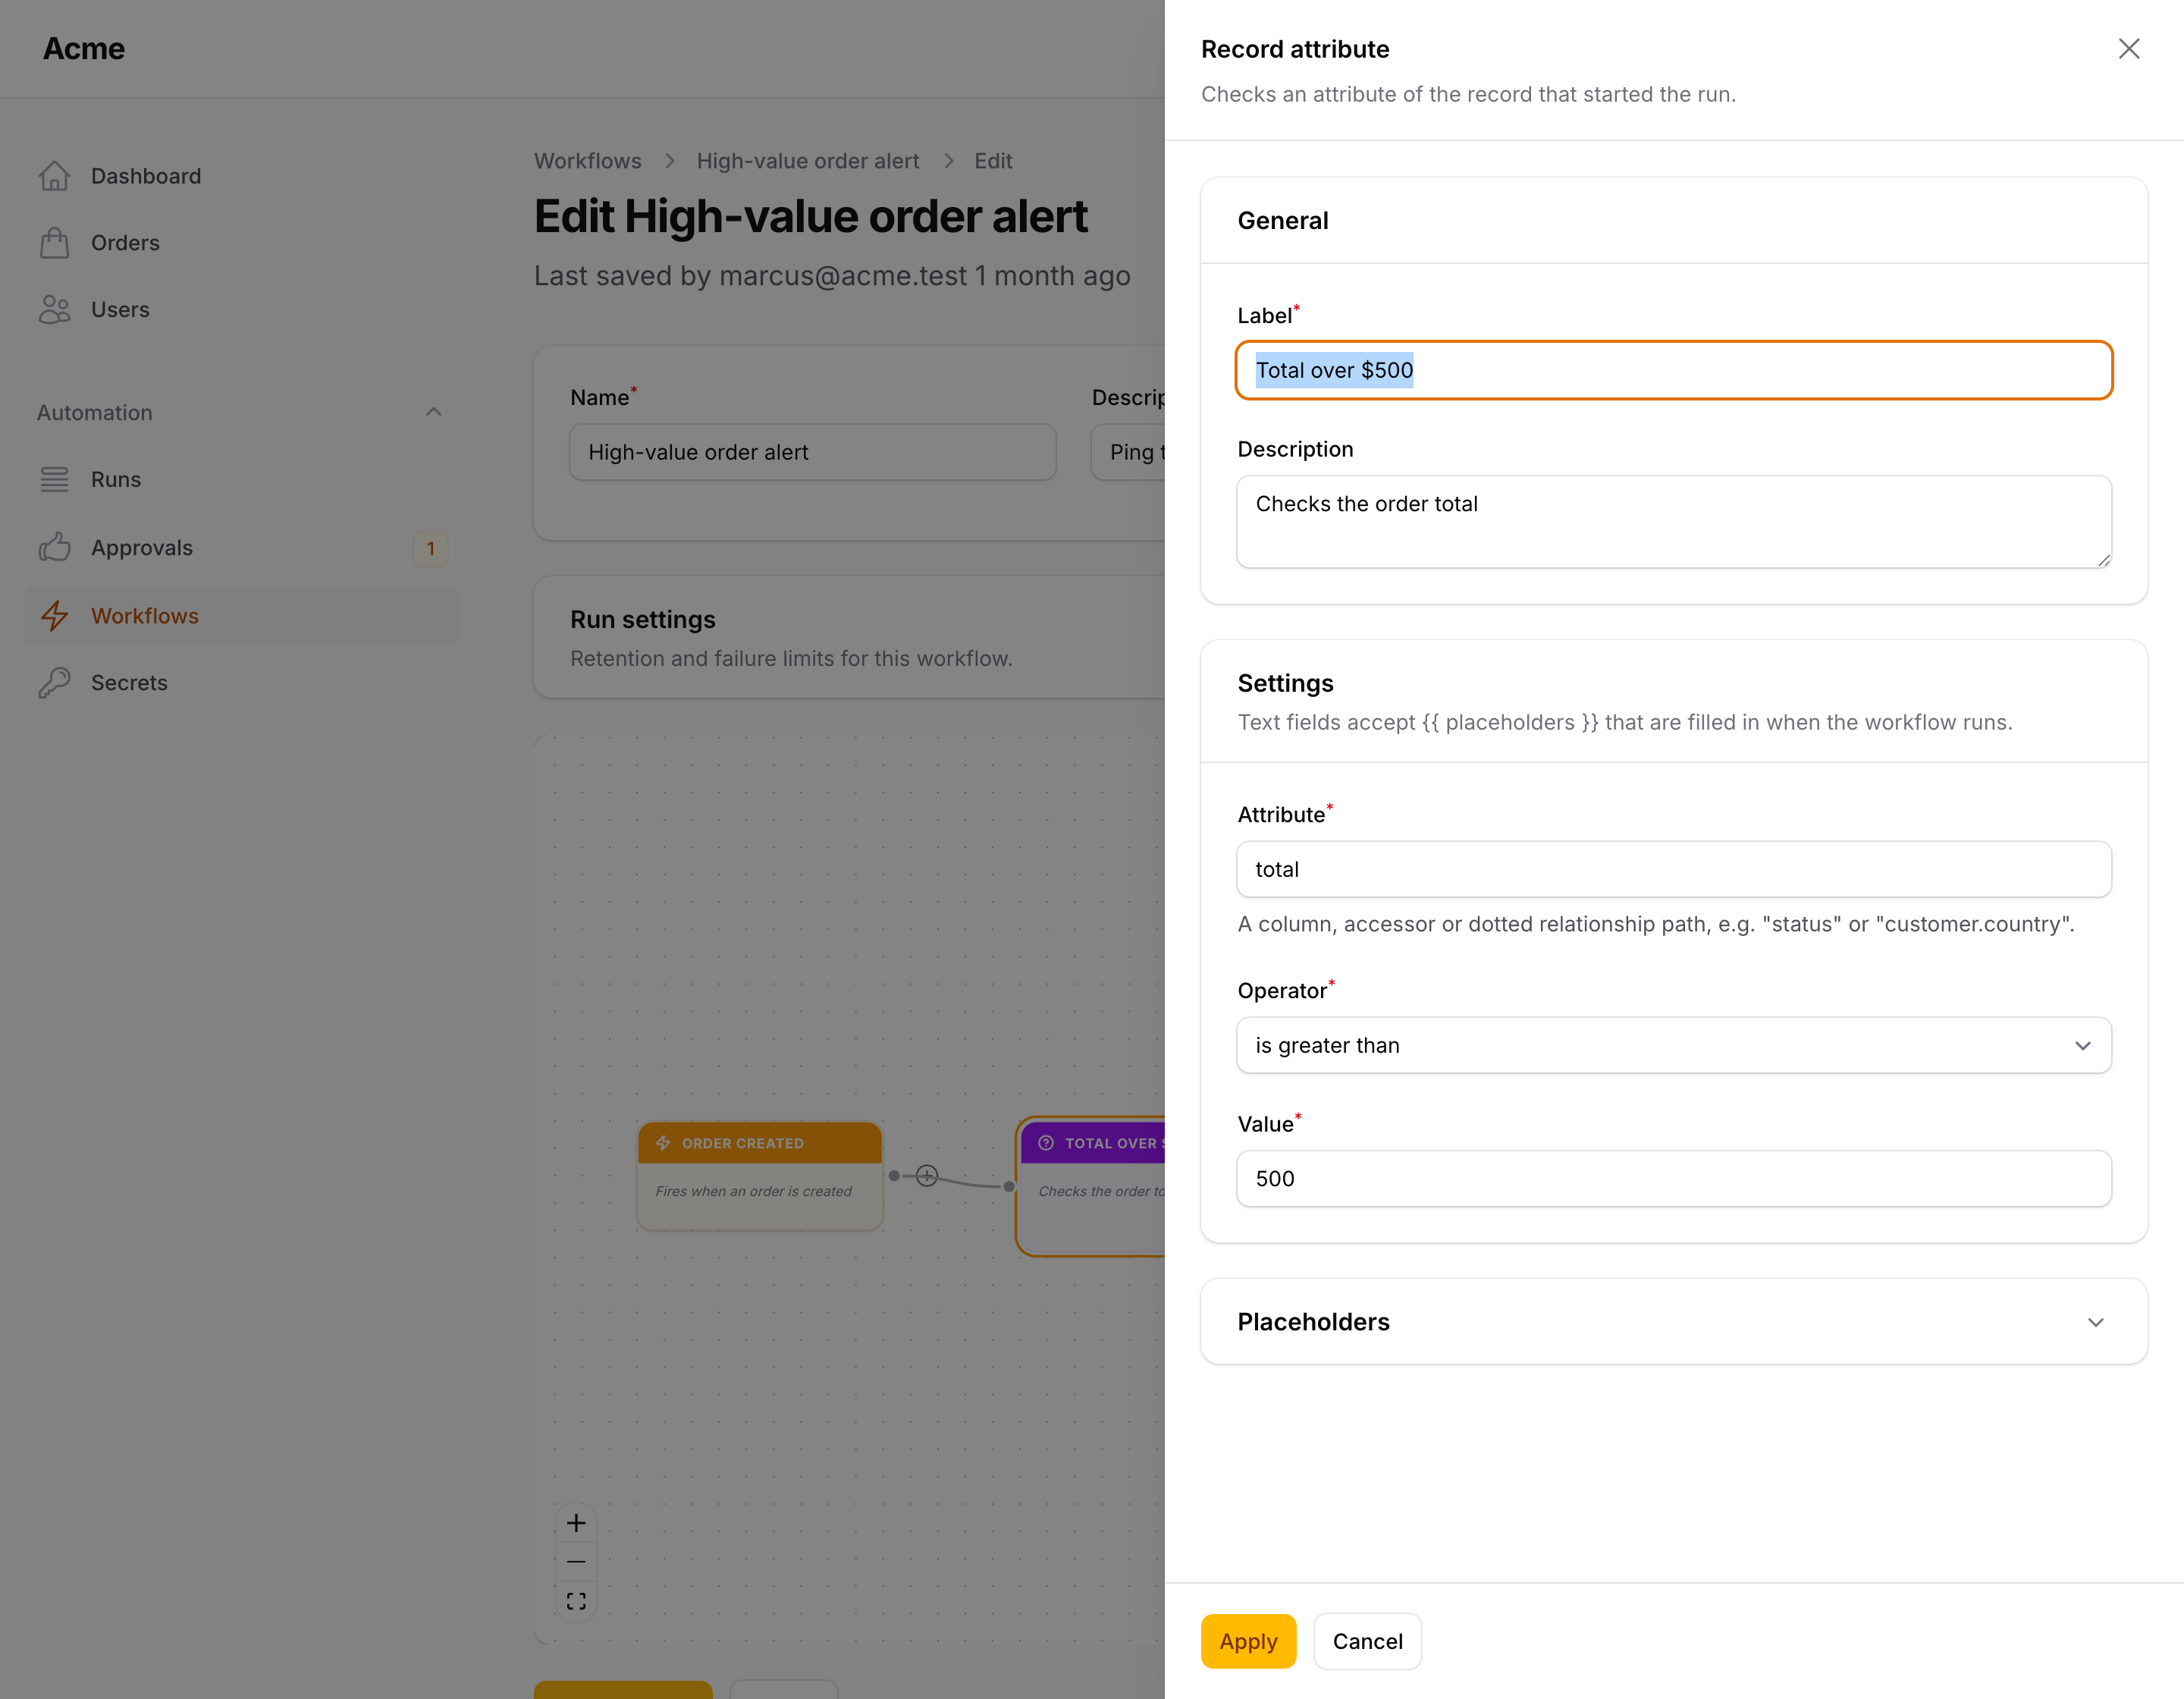
The slide-over is a Filament form:
- General — label (required, up to 80 characters) and description (up to 255).
- Settings — the node's own fields, e.g. the record type of a trigger or the recipient and subject of an email. Fields are validated when you press Apply; a cron expression, a JSON body or an event class that does not exist is rejected right there.
- Error handling — action nodes only: retries, the pause between them, and whether the last failure fails the run or is logged and skipped. See Runs.
- Placeholders — a collapsed section listing the
{{ placeholders }}that node understands. See Placeholders.
Apply writes the values back to the node on the canvas. They are stored when you save the workflow.
Selecting, copying, duplicating and deleting
Click a node to select it; Shift + drag on the background draws a selection box, Cmd / Ctrl + click adds a node to the selection, and Cmd / Ctrl + A selects everything. Right-click a node for Settings (a single node), Copy, Duplicate and Delete; when the node is part of a selection, the menu acts on the whole selection and says so ("Delete 3 nodes"). Right-click the background for Add node, Paste and Select all. The menu can be driven from the keyboard: Shift + F10 or the Menu key opens it for the selected node, the arrow keys move, Enter activates, Escape closes.
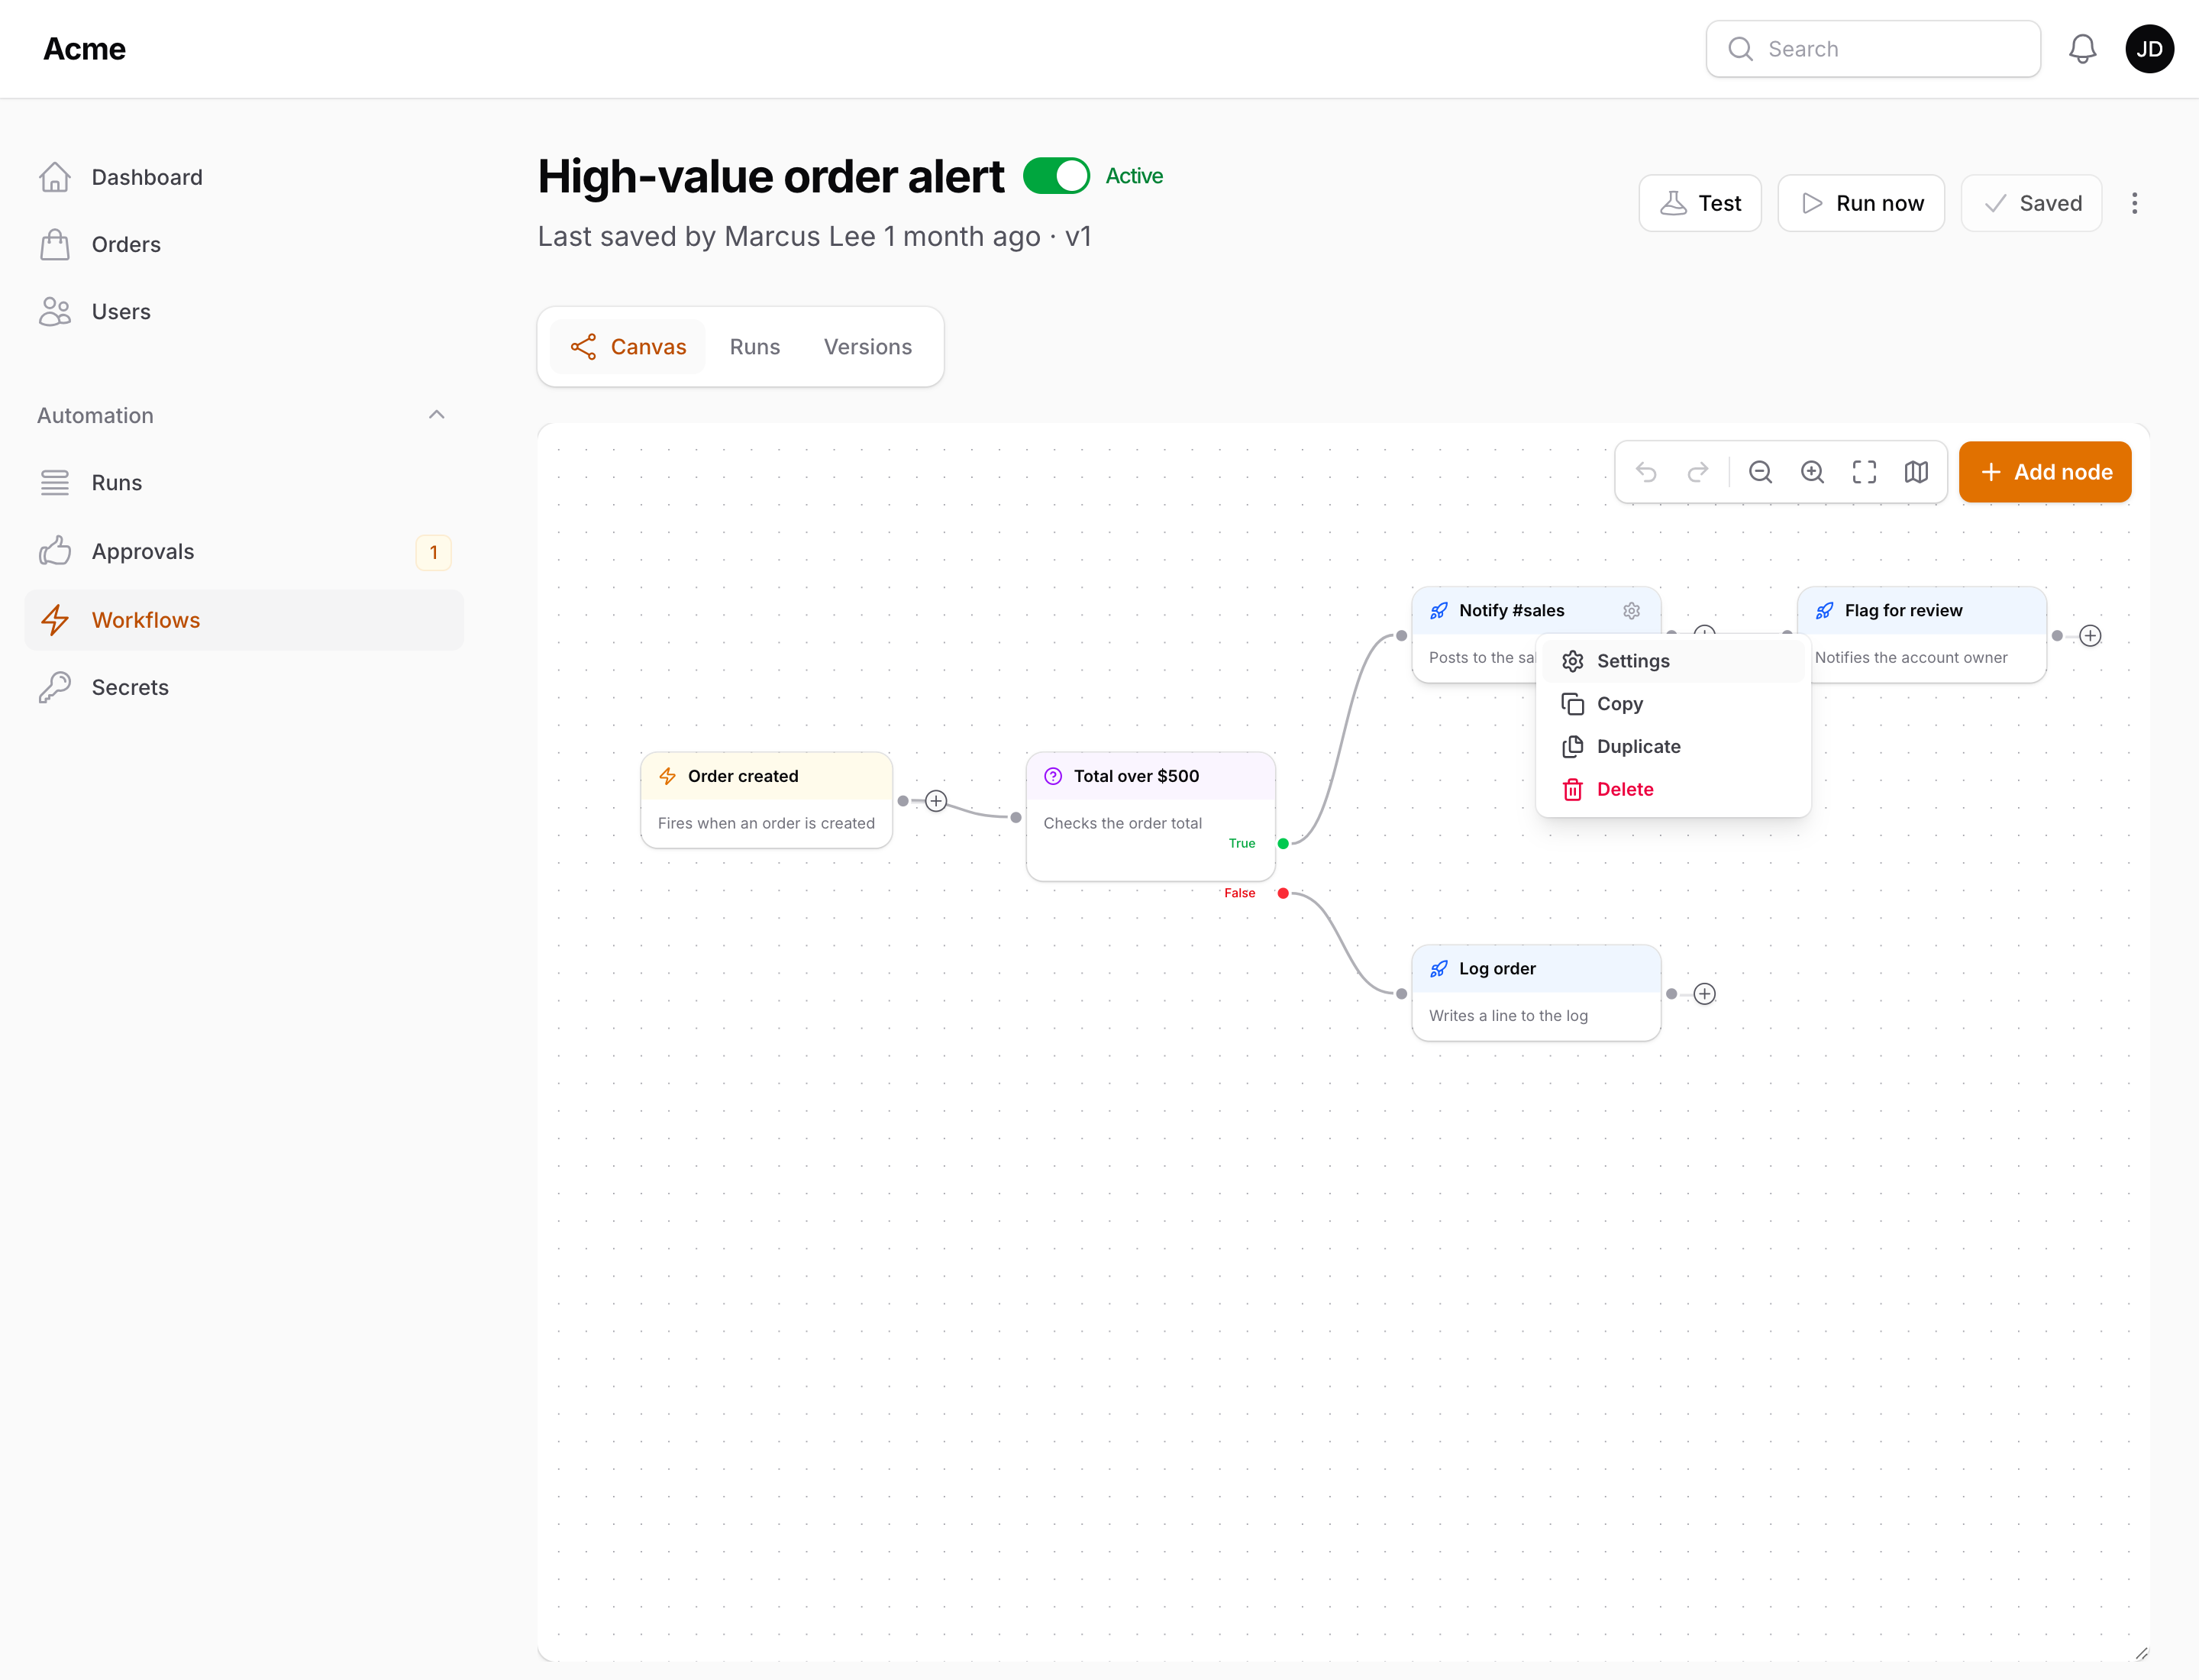
A duplicate keeps the label, description and settings, is placed slightly offset from the original, and keeps the edges between the duplicated nodes; nothing connects it to the rest of the graph. Copy and paste (Cmd / Ctrl + C, Cmd / Ctrl + V) do the same through a clipboard that lives in the page, so a selection can be pasted several times; Cmd / Ctrl + D duplicates the selection in one step.
Undo and redo
Every change to the graph — a node added, moved, edited, connected or removed — is a step. Cmd / Ctrl + Z undoes, Shift + Cmd / Ctrl + Z (or Ctrl + Y) redoes; the two buttons in the toolbar at the top-right corner of the canvas do the same. Selecting or panning is not a step, and a drag counts once, when it ends. The history is kept while the page is open and starts afresh on reload.
Saving
New workflow on the Workflows page opens the create page: give the workflow a name (and a description, if you like), keep Blank canvas picked under How do you want to start?, and Create workflow creates it inactive and opens it in the editor. The same page starts a workflow from a template, a description or an export. Save changes in the header (or Cmd / Ctrl + S) stores the canvas. It shows while the canvas has changes to save; otherwise the header says Saved. On a phone, Save moves to a bar at the bottom of the screen that comes up with the first change, next to Discard (which reloads the last save).
The Active switch next to the workflow's name turns the workflow on or off in one click. Like Save changes, it stores the canvas as it is, so switching on runs the checks below: when they fail, the switch stays off, a notification says so and the nodes concerned are marked.
Settings in the header's more-actions menu holds the name, the description, the Active toggle and the Run settings (retention and failure limits, see Runs). Its Save stores them together with the canvas as it is, so switching a workflow on runs the checks below: when they fail, the workflow stays inactive, a notification says so, the nodes concerned are marked, and the other settings are saved.
Only active workflows run. New workflows start inactive, and a copy made with the table's Replicate action is inactive too, so you can finish a draft safely before switching it on. A copy gets its own webhook tokens, so it never answers to the original's URL.
Saving an active workflow checks the definition first and refuses it with a message per problem: no trigger node, a node nothing leads to, or a required setting left empty (a node dropped on the canvas whose settings were never opened). The nodes concerned get a red badge on the canvas; hover it for the messages. The badge disappears when the node is edited or connected, and every badge clears when the next save passes. Inactive drafts are only checked for nodes whose class is no longer registered.
A workflow just created from a template, an import or a description opens with the same badges already on the nodes still to fill in: its edit URL carries ?review=1. To open any workflow that way, or never, call FlowBuilder::make('definition')->reviewOnOpen(true) / reviewOnOpen(false) on the field.
When a workflow is saved, its trigger nodes are mirrored into the flow_workflow_triggers table. That is how the dispatcher finds candidate workflows for an incoming event with one indexed query — you never edit that table yourself.
Canvas controls
- Scroll to zoom, drag the background to pan; the toolbar in the top-right corner zooms, fits the graph to the view and shows or hides the minimap, which appears by itself once a workflow has more than twelve nodes. Coming back to the Canvas tab fits the graph again.
- Escape closes the sidebar and any open menu.
- The canvas follows Filament's light and dark mode.
- Drag the bottom-right corner of the canvas to make it taller;
FlowBuilder::minHeight()sets the starting height (see Configuration).
| Shortcut | |
|---|---|
| Backspace / Delete | Remove the selected nodes and edges |
| Cmd / Ctrl + Z, Shift + Cmd / Ctrl + Z | Undo, redo |
| Cmd / Ctrl + C, Cmd / Ctrl + V | Copy, paste the selection |
| Cmd / Ctrl + D | Duplicate the selection |
| Cmd / Ctrl + A | Select all |
| Shift + F10 / Menu key | Open the menu for the selected node |
| Escape | Close the sidebar or the menu |
Shortcuts apply while the canvas has focus; typing in the search box or in the settings slide-over never triggers them.
How a definition is stored
The definition column of a workflow is JSON with two lists, nodes and edges, in the shape the canvas uses. The runner reads the same structure, so a workflow can be created from code, seeded or asserted in a test without the UI:
use Packstub\Flow\Models\Workflow;
use Packstub\Flow\Nodes\Actions\SendEmail;
use Packstub\Flow\Nodes\Conditions\RecordAttribute;
use Packstub\Flow\Nodes\Triggers\RecordUpdated;

Workflow::create([
    'name' => 'Shipping notice',
    'is_active' => true,
    'definition' => [
        'nodes' => [
            [
                'id' => 'trigger-1',
                'type' => 'trigger',
                'position' => ['x' => 0, 'y' => 0],
                'data' => [
                    'identifier' => RecordUpdated::class,
                    'label' => 'Order updated',
                    'description' => null,
                    'config' => ['model_class' => App\Models\Order::class],
                ],
            ],
            [
                'id' => 'condition-1',
                'type' => 'condition',
                'position' => ['x' => 300, 'y' => 0],
                'data' => [
                    'identifier' => RecordAttribute::class,
                    'label' => 'Shipped?',
                    'description' => null,
                    'config' => ['attribute' => 'status', 'operator' => '=', 'value' => 'shipped'],
                ],
            ],
            [
                'id' => 'action-1',
                'type' => 'action',
                'position' => ['x' => 600, 'y' => 0],
                'data' => [
                    'identifier' => SendEmail::class,
                    'label' => 'Notify the customer',
                    'description' => null,
                    'config' => [
                        'recipient' => '{{ model.customer.email }}',
                        'subject' => 'Order {{ model.reference }} is on its way',
                        'body' => 'Hi {{ model.customer.name }}, your order has shipped.',
                    ],
                ],
            ],
        ],
        'edges' => [
            ['id' => 'e1', 'source' => 'trigger-1', 'sourceHandle' => 'output', 'target' => 'condition-1', 'targetHandle' => 'input'],
            ['id' => 'e2', 'source' => 'condition-1', 'sourceHandle' => 'true', 'target' => 'action-1', 'targetHandle' => 'input'],
        ],
    ],
]);
| Key | Meaning |
|---|---|
nodes[].id |
Unique within the workflow; the canvas generates trigger-…, action-…, condition-… ids |
nodes[].type |
trigger, action or condition |
nodes[].position |
x / y on the canvas |
nodes[].data.identifier |
The node class. Only classes registered with the plugin are ever instantiated |
nodes[].data.label, description |
What the node shows |
nodes[].data.config |
The values of the node's settings form, passed to matches() / evaluate() / handle() |
edges[].source, target |
Node ids |
edges[].sourceHandle |
output on triggers and actions, true or false on conditions |
edges[].targetHandle |
input |
When the form is saved, transient canvas state (selection, measured sizes) is stripped and only the keys above are kept.
Next: Triggers.